VPN SETUP ON FIRE STICK
![]()
HOW TO SET UP A VPN CONNECTION ON AMAZON FIRE STICK
Firstly we must say that although direct VPN set up is possible on the Amazon Fire Stick is possible, it is in fact quite a difficult procedure and unless you have intermediate-advanced knowledge of the technology then it is not advisable to attempt as it is possible that you may corrupt your stick if carried out incorrectly. For beginners, the easiest way by far to have a VPN connection running and using your Amazon Fire Stick overseas is to have a VPN Router installed, as this will change the IP location of all of your devices with the need for individual programming.
NOTE: YOU WILL NEED A VPN ACCOUNT FROM US FIRST. TO REGISTER A 30 DAYS FREE UK/US/CA/EU VPN ACCOUNT CLICK HERE
Installing OpenVPN on Fire Stick
Firstly we recommend that you connect a keyboard/mouse set to your Fire TV using the USB port at the back. This will make typing and navigating on Fire TV a lot easier. If you don’t already have a wireless keyboard/mouse set, I recommend either Mele F10-PRO or iPazzPort Wireless Keyboard and Touchpad with IR Remote Control. These TV box remotes allow you to control your device with minimum effort.
-
Setting up the Fire TV development environment
To begin you first need to set up the development environment where you can connect to your Fire TV and install apps on it (often referred to as “sideload”). Fire TV’s operating system, Fire OS, is based on Android which is fairly easy to work with if you’re familiar with Android. On this page you will find information on how to set up a development environment for Fire TV, how to connect, and how to install apps on it.
-
Root (Jailbreak) Fire TV
Before you can install VPN on Fire TV, you first need to “root” or jailbreak it. To learn how to root your Fire TV, follow the instructions here. Next install/sideload “Busybox” application. Don’t forget to disable the “Fire TV updater” at the end of the “rooting” procedure.
Install OpenVPN Binary
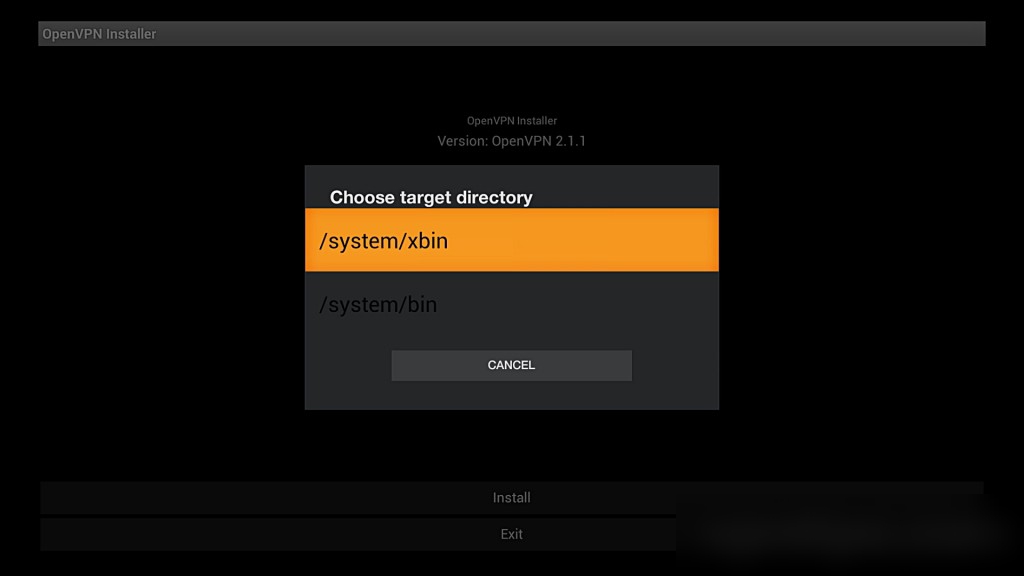
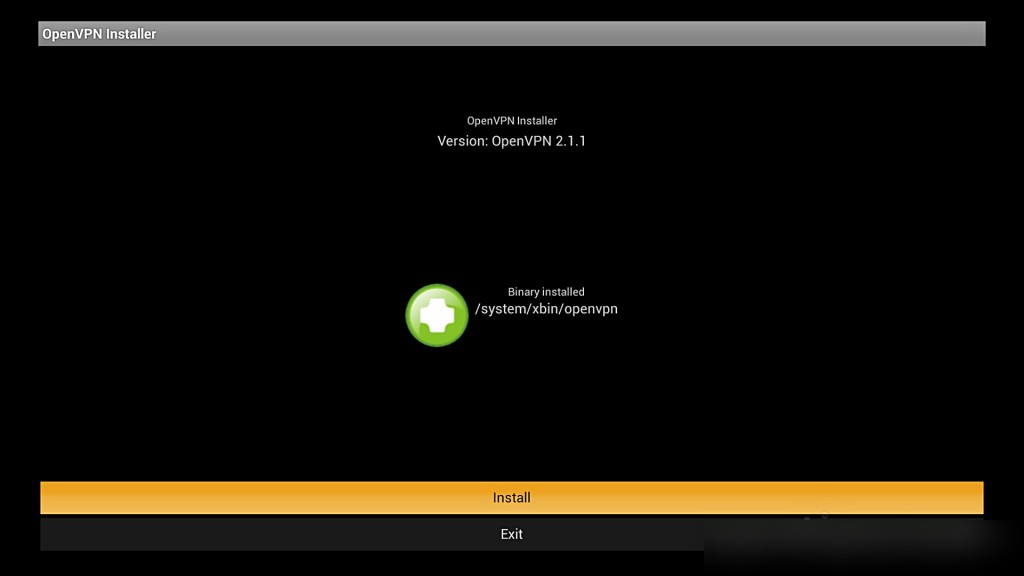
You can’t use VPN on Fire TV out of the box because it doesn’t have the library files that support VPN functionality; to add VPN support to your Fire TV we’ll next install two apps: OpenVPN Installer and OpenVPN Settings. OpenVPN Installer adds the necessary VPN binary files to your Fire TV, and OpenVPN Settings makes configuring your VPN easier.
-
Download Apps
Go to APK Downloader website to find and download the following apps: “de.schaeuffelhut.android.openvpn.installer”, and “de.schaeuffelhut.android.openvpn”. Make sure you remember where the files are saved!
-
Sideload the Apps
- Open a command prompt or terminal window.
- Change directory (CD) to your Android SDK platform-tools directory.
- Connect to Fire TV using the following commands:

- Install the Apps

Alternatively, you can install the above apps directly from Google play onto your Fire TV. Simply login to Google play search for and install “OpenVPN Installer”, and “OpenVPN Settings”. By default, Fire TV doesn’t support Google play, so you need to manually install and enable it.
-
Run the “OpenVPN Installer”
On Fire TV, go to Settings
Applications
Manage All Installed Applications; scroll down to find “OpenVPN Installer” and launch it. Follow the on-screen instructions to install the OpenVPN binary files.


Configure VPN
With the OpenVPN binary files successfully installed, we’ll next configure our VPN using the following steps:
- First download the OpenVPN configuration files from us
https://vpn01.com/vpn01.com-openvpn.zip - Make sure you’re connected to the Fire TV.
- Upload (push) the downloaded configuration files to Fire TV using the following commands:

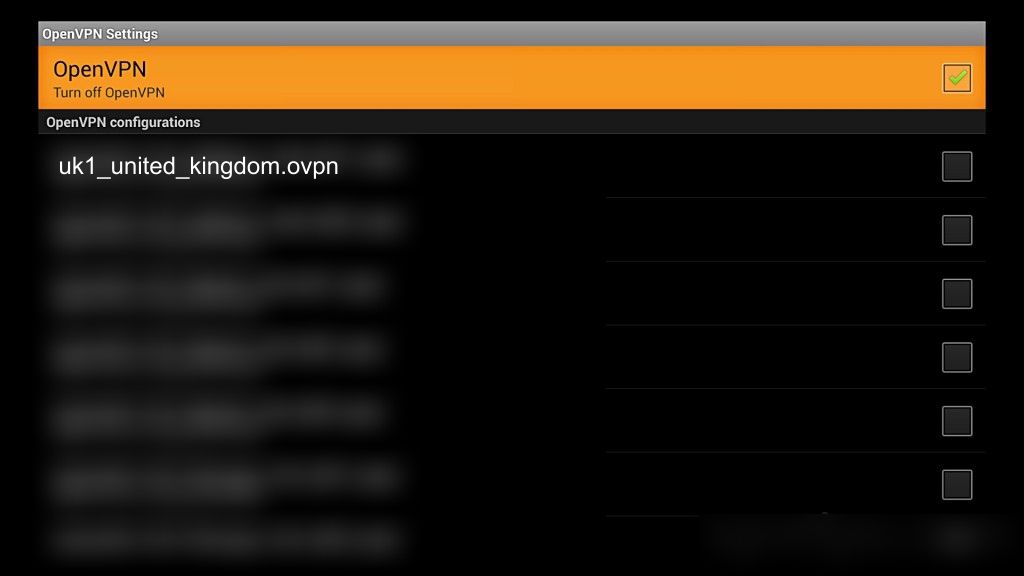
- Configure Your VPN Using “OpenVPN Settings”
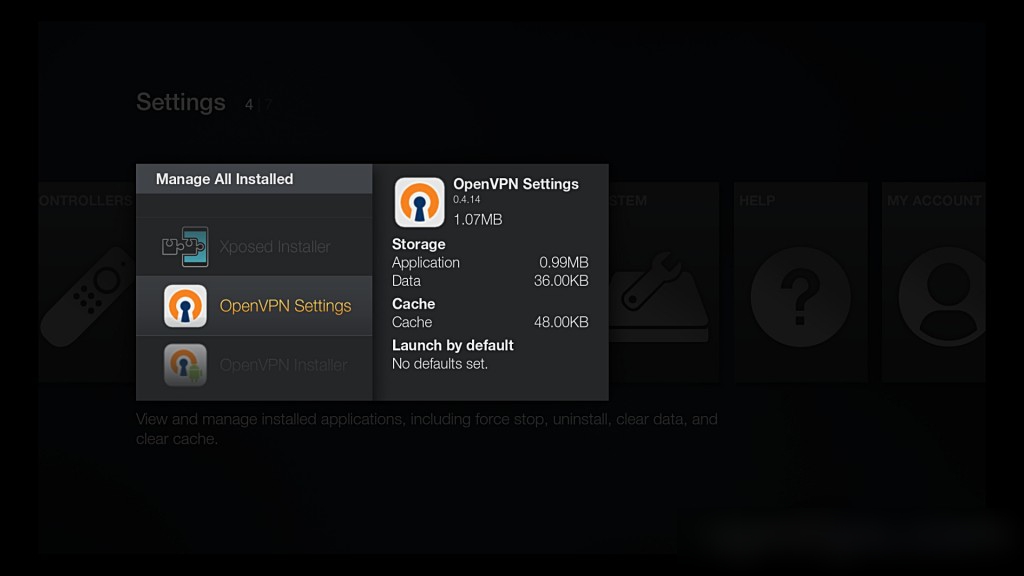
On Fire TV go to SettingsApplications
Manage All Installed Applications; scroll down to find “OpenVPN Settings” and launch it. First, make sure you turn the OpenVPN on; then select a VPN by location from the list; finally, enter the username and password credentials of your VPN account and click “OK”.
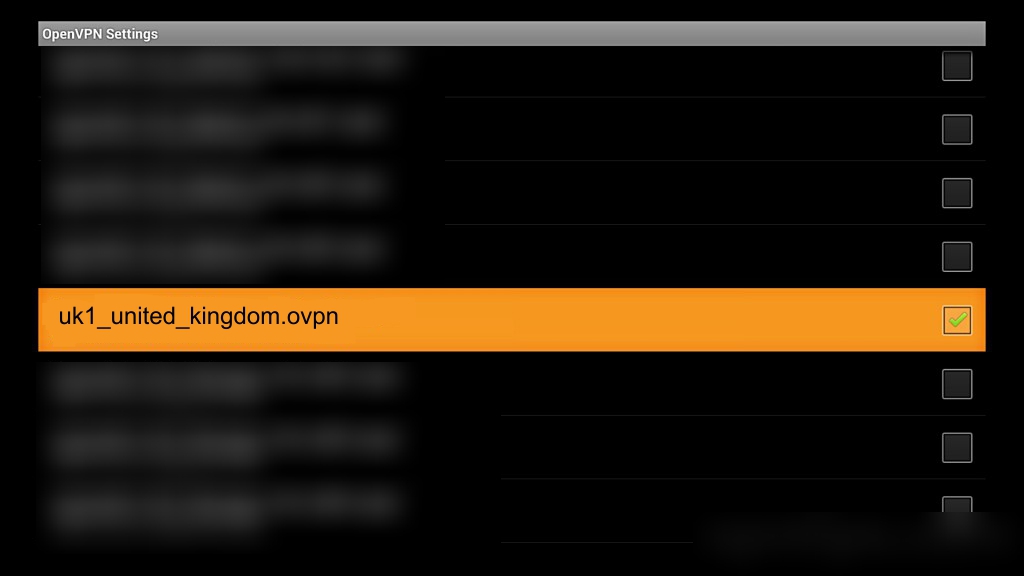
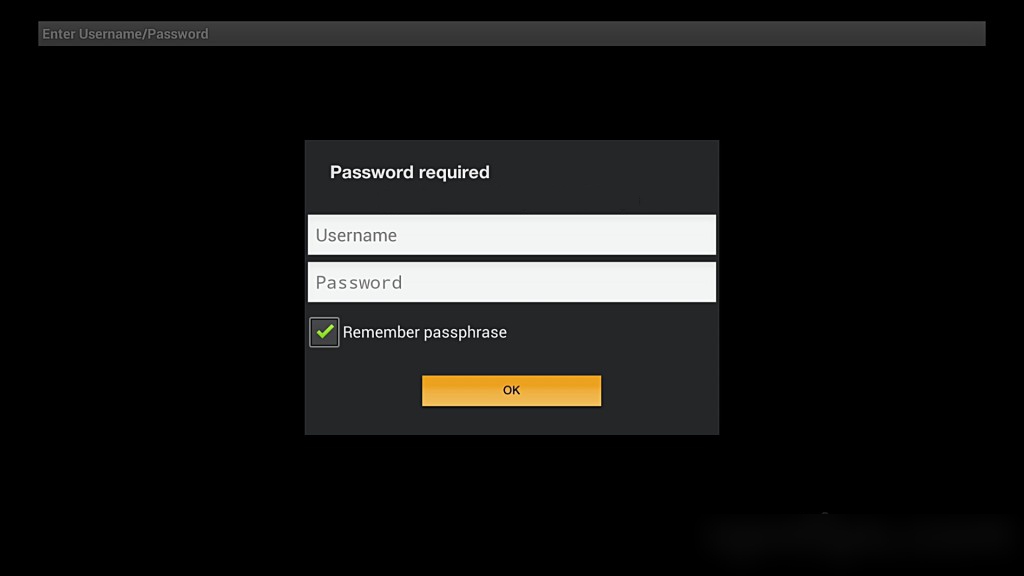
Hopefully now you should have the VPN successfully installed on your Fire Stick. If you have had any issues with this, I would recommend purchasing a VPN router or repeater as the easier alternative option.
OUR VPN SERVER LIST (IF NEEDED)
SELECT A UK SERVER FOR UK TV APPS & SERVICES, A US SERVER FOR US
TV APPS AND SERVICES AND THE P2P SERVER FOR DOWNLOADING TORRENTS
uk1.vpn01.net (London, GBR)
uk2.vpn01.net (London, GBR)
uk3.vpn01.net (London, GBR)
uk4.vpn01.net (Hampshire, GBR)
uk5.vpn01.net (Hampshire, GBR)
uk6.vpn01.net (Hampshire, GBR)
uk7.vpn01.net (Coventry, GBR)
us1.vpn01.net (NYC, USA)
us2.vpn01.net (NYC, USA)
us3.vpn01.net (Los Angeles, USA)
us4.vpn01.net (Denver, USA)
us5.vpn01.net (Dallas, USA)
us6.vpn01.net (Chicago, USA)
ca1.vpn01.net (Toronto, Canada)
se1.vpn01.net (Stockholm, Sweden)
nl1.vpn01.net (Amsterdam, Holland)
de1.vpn01.net (Frankfurt, Germany)
sk1.vpn01.net (Bratislava, Slovakia)
il1.vpn01.net (Tel-Aviv, Israel)
p2p.vpn01.net (Torrent Server)
NOT WORKING? See our troubleshooting help page.

